Buyer Configuration
Provides the ability to view and edit the Buyer's payment functionality and payment types including buyer settings, payment settings, or notification methods and types.
Key points and considerations
-
You will only see the edit option on this Buyer Configuration page if you have the appropriate role/permissions.
-
You may see different options than the sample screenshot below depending upon the functionality implemented.
-
Payment types, settings, and notifications are initially defaulted from what is configured in Merchant Portal when a Buyer is added; use this page to edit these settings for a given Buyer.
-
Once a Buyer is configured in BillPay Portal, it will no longer automatically get default settings from Merchant Portal.
-
How to use
-
Select the desired Buyer from the dropdown list.
-
If there are multiple Buyer Divisions, select the appropriate one from the dropdown list.
-
View the information. Click expand all/collapse all to display or hide all available Buyer Configuration settings and notifications. If changes are required, click edit.
-
Click save. Click cancel to edit other settings on the Buyer Configuration page.
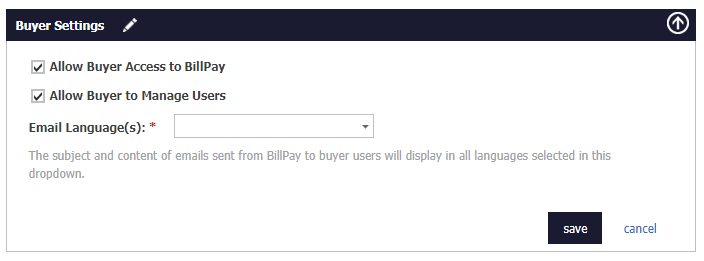
Buyer settings
-
Select Allow Buyer Access to BillPay to enable Buyer users to access BillPay.
-
Select Allow Buyer to Manage Users to enable Buyer users to manage other users in BillPay.
-
Click the Email Language(s) dropdown, and then:
-
Select Language to enable (or clear the checkbox to disable).
-
Search for and select one or more languages. You can set the language for the subject and body content in emails sent from BillPay to Buyer users to one of the following fully supported languages: English and French (Canadian).
-
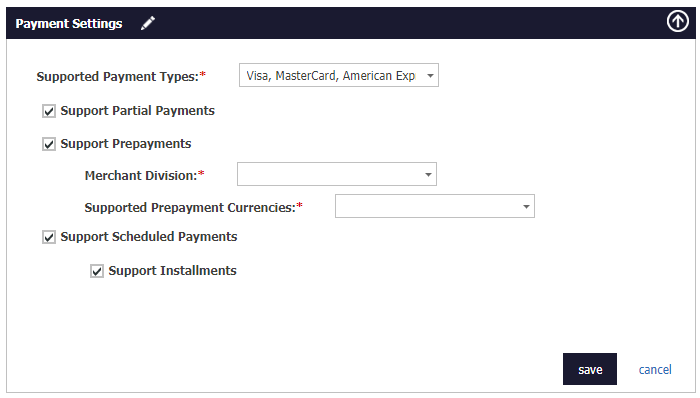
Payment settings
-
Select one or more Supported Payment Types to determine which payment types are supported in BillPay. Options may include Visa, MasterCard, American Express, Discover, and eCheck.
-
Select Support Residual Payments to enable residual payments. If you have Residual Payments enabled in Merchant Portal:
-
It is enabled by default for new Buyers.
-
You cannot enable Partial Payments nor Installment Payments with Residual Payments enabled. You would have to disable it for a given Buyer to activate those options.
-
Select Support Partial Payments to enable partial payments.
-
Select Support Prepayments to enable prepayments. If you are supporting prepayments and the Merchant Division and/or Support Prepayment Currencies fields are blank, an error message displays when a user accesses the Submit Prepayment page.
-
These fields must be configured for each Buyer on this page.
-
The Merchant Divisions(s) that populate the dropdown list are created in Merchant Portal at the Merchant level.
-
The supported currencies that populate the dropdown list are created in Merchant Portal. Options may include the Canadian dollar (CAD), United States dollar (USD), and the Euro (EUR).
-
Select Support Scheduled Payments to enable scheduled payments.
-
Search Support Installments to enable payment installments.
Notification methods
Provides the ability configure the types of notifications
Viewing default configuration settings
The display mode can vary depending upon different configuration scenarios.

The following table defines all of the configuration options.
| Configuration setting | Purpose and additional information |
|---|---|
|
Support Email Notifications |
Enable this if you want email notifications sent to Buyer users. |
|
Send To All Users -OR- Custom List |
Both of these radio buttons are available if you select to support email notifications. You can choose one of the options. Send to All Users is enabled by default when you enable Support Email notifications. Note that when sending to all Users, it will not go to any users in Pending or Pending (expired) status. For a Custom List, you can enter up to 10 email addresses. |
|
Support Print to Mail Notifications |
Enable this setting if you want invoices to be printed and mailed to the Buyer. When you update the address, the Audit Log will display this change.
|
|
Mail To Address |
These values default from the Buyers profile. You can enter a specific name or department in the Attention field which will display on the envelope under the Company Name. You can also change any part of the address. If you change this address it does not change the address on the Buyers profile. |
Notification types
-
Select Support New Invoices Notifications to enable Buyer users to receive notifications when invoices are added in BillPay.