Process Credit Invoices
A credit invoice in BillPay is an invoice with a negative total amount. These are processed on the Pay Invoices page accessed under the Payments menu.
If you are just paying standard debit invoices (with a positive total amount), see Pay Invoices topic.
Credit invoice processing criteria
If you have credit invoice(s), you can process those to offset debit invoice(s). There are some criteria that must be met in order to process a credit invoice. Please read the following bullet points:
-
You can only process credit invoices(s) if you have also selected at least one debit invoice with the same currency and merchant division as the credit invoice and the total combined payment amount must be greater than or equal to $0.
-
You cannot change the "payment amount" for a credit invoice. I.e. you cannot process only part of the credit amount.
-
If the total payment amount balance of all of the selected credit and debit invoices with the same currency and merchant division is greater than $0:
-
When the payment is submitted, an authorization is made which will generate the following:
-
Transaction # (XiPay Transaction ID)
-
Transaction Ref
-
-
The credit invoice status will change to Pending.
-
Debit invoice status will change to either Partial or Pending depending on if there is a remaining balance or not.
-
-
If the total payment amount balance of all of the selected credit and debit invoices with the same currency and merchant division is equal to $0:
-
No authorization is performed, only a BillPay Transaction Ref is generated.
-
The credit and debit invoice statuses change to Paid.
-
-
If there are additional debit invoices selected that have a different currency and/or merchant division, a separate authorization is made and a transaction is generated when the payment is submitted.
Credit invoice selection errors
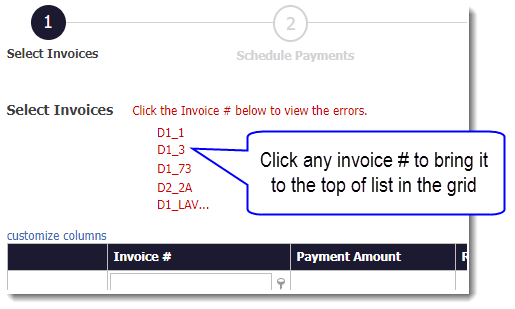
If you select invoices that do not meet the criteria specified above, error messages display. You can quickly view a list of invoices causing errors. They will be listed above the selection grid. Simply click on any Invoice # and BillPay will bring that invoice to the top of the list and then list the other invoices in error immediately below, even if the invoices selected were across multiple pages.
Steps to process a credit invoice
The general steps for processing credit invoices are the same as the steps documented for Pay Invoices, but a scheduled (i.e. future) payment is never allowed and you need to consider the Criteria and the Error information documented above.
| Buyers ARE Implemented | Buyers ARE NOT Implemented |
|---|---|
The Pay Invoices pages and steps vary slightly depending upon if Buyers are supported AND the payment features that are enabled.
High-Level Pay Invoices Steps:
-
Select Invoices
-
Schedule Payment (optional step if the Merchant has enabled future payments)
-
Enter/Select Payment Method
-
Review & Submit
-
Obtain Confirmation
Select invoices
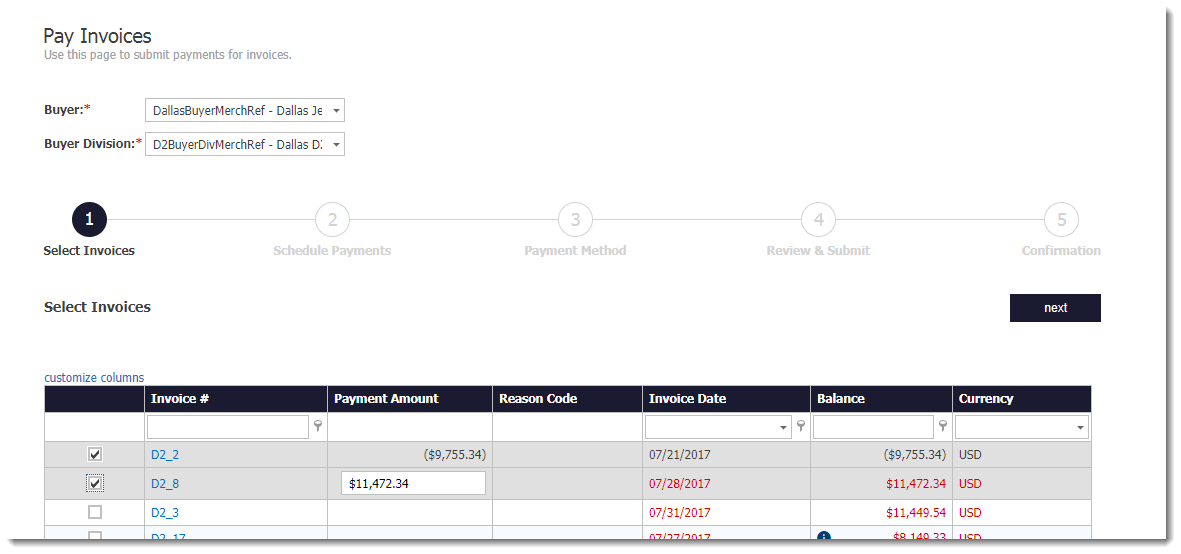
How the Invoices are selected varies depending upon whether the Merchant has implemented Buyers or not.
| Buyers ARE Implemented | Buyers ARE NOT Implemented |
|---|---|
|
|
TIP: In the invoice grid area, you can click customize columns to reorder or add/remove columns. The Merchant Division Ref column can be added to the grid when processing credit invoices to easily see if this value matches between the selected credit and debit invoices. Invoice # and Payment Amount columns cannot be moved. Reason Code column cannot be moved if that field is enabled and configured as required.
Schedule payment
When you click next after selecting your invoices, this step is bypassed as you can only choose "Pay Now". Scheduled Payments are not allowed when Credit Invoices have been selected.
Payment method
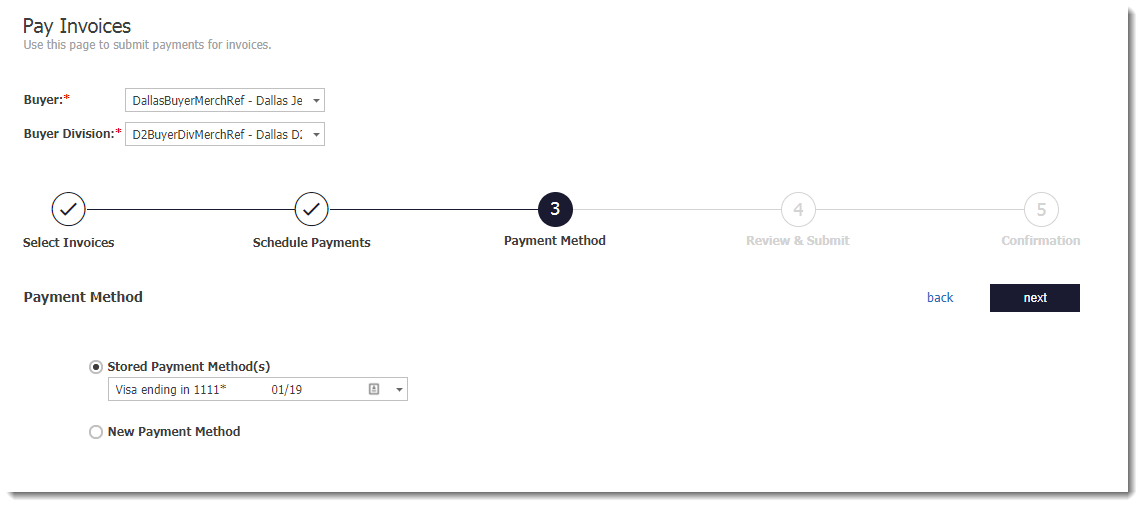
This step will vary depending on the total payment amount.
-
If the total payment amount = $0, this step will be bypassed.
-
If the total payment amount is greater than 0, the payment methods that display are limited to only those supported based off the selected invoices.
-
Select a Stored Payment Method (if available) or enter a New Payment Method.
-
If new, complete the associated payment detail fields. Some fields may be prepopulated based on the data from the first invoice selected if this feature is implemented.
-
-
Click next to continue.
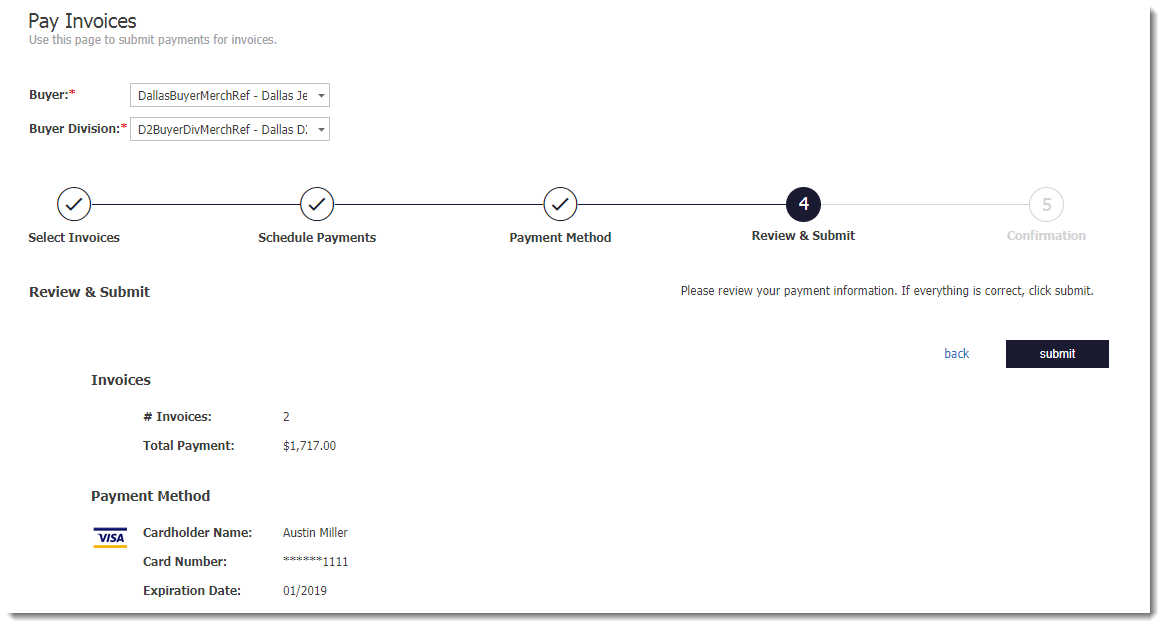
Review and submit
Review the payment details and click submit when ready.
Confirmation
A Confirmation # is provided.

You can copy/paste the Confirmation # in the Quick Search field at the top of the page (next to the gear icon) to view the Confirmation Details page.